It's time to straighten up the pot of orchids at home. It's not difficult to change the basin according to the following.
After a hot summer day, we will start to regulate the flowers again! If you have a pot of orchids in your home, and you don't know how to change the pot, this article can help you!
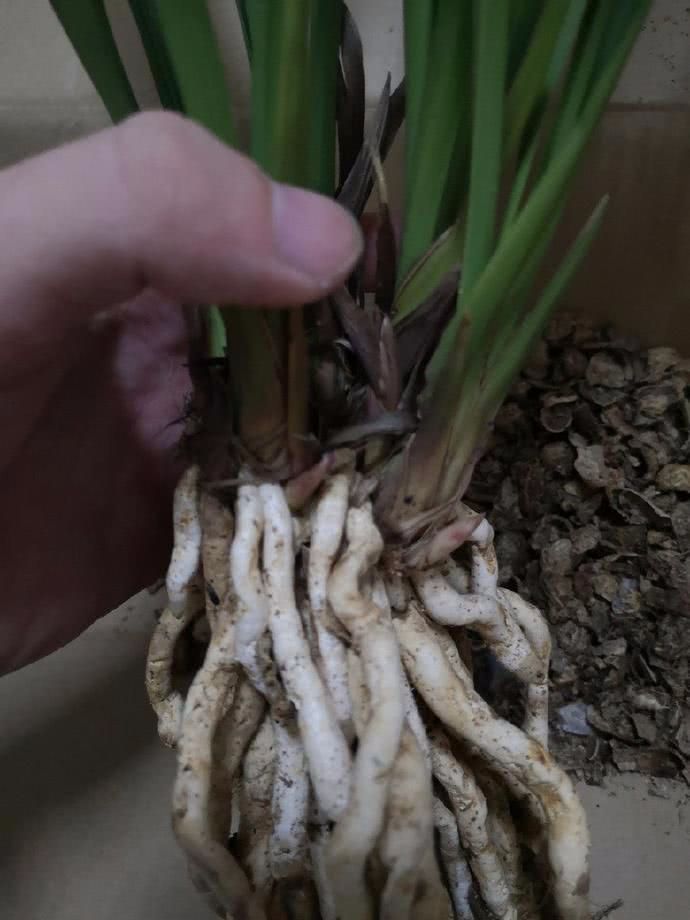
Step 1: take off the basin
In general, the surface of orchids are covered with water moss, and the air permeability of the soil is also better. So it's easier to take off the basin. Put the pot down, hit the bottom of the flowerpot, shake it gently, and it will basically come out! Remember not to pull out the root system hard, it's easy to get hurt.
Step 2: prune the root system
After taking off the basin, check the growth of the root system and rinse it with water first to make sure that the growth of each root system can be seen clearly. It is found that the roots that do not grow well should be cut off in time. If there is decay, it is recommended that you can easily disinfect it with carbendazim or potassium permanganate after pruning.
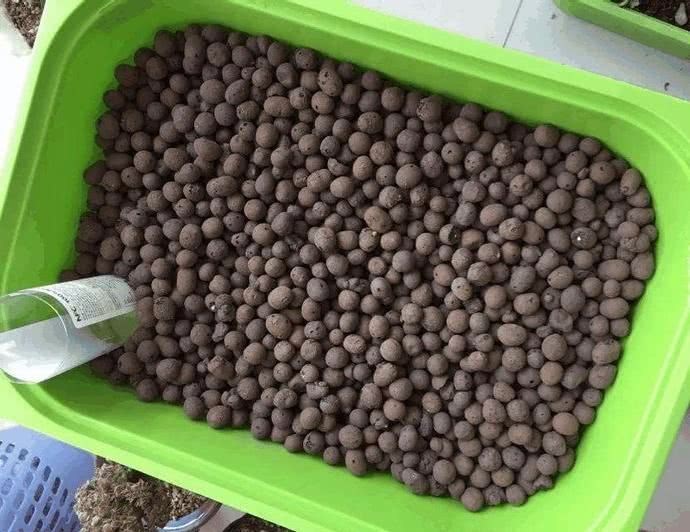
Step 3: prepare the soil
Orchids are different from other plants, so he must prepare the soil carefully. Mix peanut shell, fine sand, ceramsite and garden soil evenly. Of course, after it is ready, it should be disinfected, watered directly with carbendazim, and then dried.
Step 4: put on the basin
When the soil is 2/3 dry, you can plant the orchids! On the pot, remember to press the root system a little bit to ensure that the root system is in close contact with the soil, and don't break the root system by exerting too much force on the egg.

- Prev
Succulent cuttings have tricks to wash baskets and plastic bottles are all used without fear of rooting and survival rate bars.
Succulent cutting is basically half of the case, some leaves grow roots, sometimes to wilt bar or a leaf, too dry do not root, too wet leaves will rot away! How come other people's succulent cuttings are so simple.
- Next
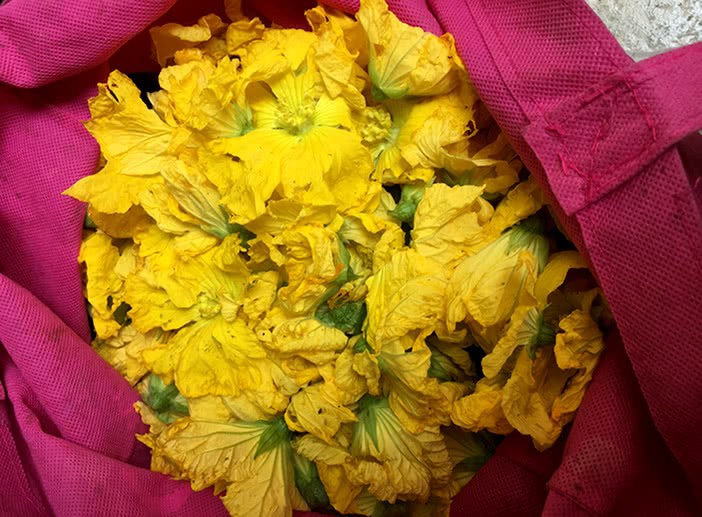
Mom went to the field and picked a big bag of flowers. This flower is a treasure all over the body, so I will give it to my neighbor.
Now it is autumn, and the melons, fruits and vegetables in the field have been almost eaten. Today, my mother went to the field to pull the wilted vegetable vines and dig the ground to loosen the soil. When she came back, she picked a big bag of towel gourd flowers and said she would take them back to make steamed buns.
Related
- Wuhan Hospital Iron Tree Blooming Result Was Instantly Frightened by the Gardener Master
- Which variety of camellia is the most fragrant and best? Which one do you like best?
- What is the small blue coat, the breeding methods and matters needing attention of the succulent plant
- Dormancy time and maintenance management of succulent plants during dormancy
- Minas succulent how to raise, Minas succulent plant pictures
- What are the varieties of winter succulent plants
- How to raise succulent plants in twelve rolls? let's take a look at some experience of breeding twelve rolls.
- Attention should be paid to water control for succulent plants during dormant period (winter and summer)
- Watering experience of twelve rolls of succulent plants
- Techniques for fertilizing succulent plants. An article will let you know how to fertilize succulent plants.